FOONG MEI
Character Design
Appealing or appaling?
To begin a character design, there are a lot of aspects to be taken onto. The design of the character should help the character in motion.
Story of the character
What is the stories behind the character?
Different background stories will bring different character design. For example if the character is a farmer, his skin might be slighty dull or tanned due to over exposed to the sun. The environment will also affects the character design.
Functionality
The design of a character should have functionality. It happen to be there to be functional and not just for the sake of design. It is important to bring the character out.
Silhoutte Value
A regconizable shape of a character is convincing, which means if we can identify it instantly with just it's silhoutte the character design is working good.
Construction Sights
After having the character silhoutte to be easily regconized, props added along with the character's body will enhance and establish the character.
Foundation Shapes
Shapes inform different characteristic in the character.
Triangle : Dangerous, unpleasant, quick, sharp, aggressive, insightful
Square : Stable, harmony, trustworthy, dependable
Round : Comfortable, soft, cute, clumsy, blant, non-aggressive


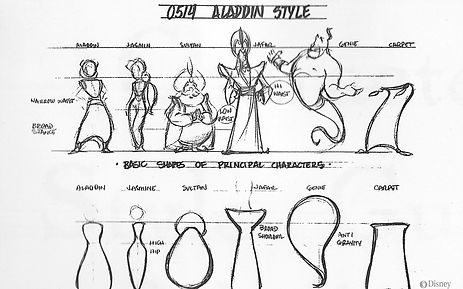
Image taken from : http://blog.azizk.com/page/4
Image taken from : http://blog.azizk.com/page/4
Image taken from : http://blog.azizk.com/page/4
Image from Disney character design
Character Design : Character Research
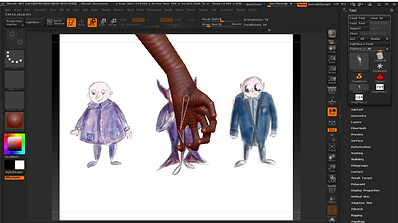
Fester Addams
In the 1960's Fester lives with his family in a gothic house. He was born with bald head, sharp nose, and a barrel shaped body. He always hunch his back with his dark and sunken eyes he looks scary and not easy to approach. However, he is kind to children where he spoiled his niece and nephew Wednesday and Pugsley.
Apart from that, he had ability to generate electricity. He lights a lightbulb by just putting it into his mouth.
He sleep on bed of nails and he cures his headache using screw to clamp his head.
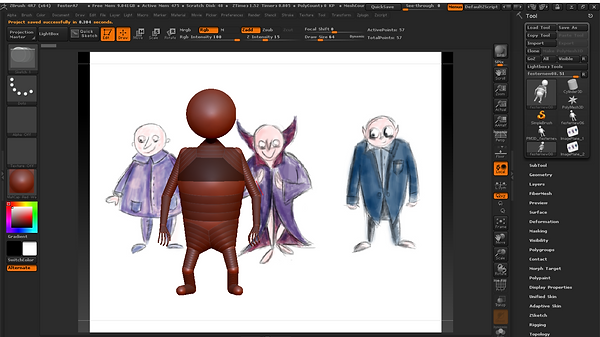
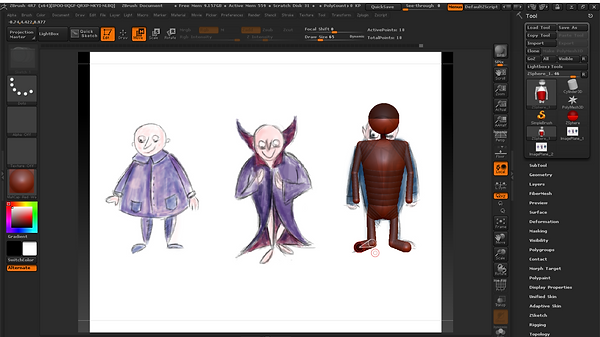
Character Images Reference
Similar characteristic with Fester Addam from The Addams Family: Dracula from Hotel Transylvania, Megamind, Barnabas Collins from Dark Shadow, Edgar and Mr Menacefrom Frankenweenie.
I had them as my character reference because they have similar background stories and their appearance are quite similar. I wanted to potray a unpleasant character physically but with great personalities to add contrast to the character.
Environment Research
Gothic houses. Dark environment.
Character Design


Character Design
Fester is a fictional character which already existed but I redesign it to be different from the movie.
In my design, I take note in the shape which inform the character personality.
He is round which make him look cute and not harmful. In order to add characteristic of him, the ear and nose is sharp to inform that his character is still scary in some way.
The character is simple with the silhoutte shape. I choose the third character with the penguin suit up costume.
Silhoutte
Z brush lesson - Beginner
We had Henning Sanden - Charater Modeller from MPC to give us tips and tricks of character design.
His first lecture covers
1. Story
2. Functionality
3. Shape Language
4. Silhoutte
His second lessons cover Tips and tricks in Sculpting.
First of all, sculpt from inside out. Start building up the skeleton and according to the proportion.
Next followed by muscle, fat and skin.
Research is really important, getting a lot of reference help you to sculpt realistic and functional.
Brush that usually been used:
1. Dam standard
2. Standard
3. Clay Buildup
4. Move
5. Trim dynamic
" Every single stroke need to have a function. Avoid using smooth brush as it will reduce the details of the model!"
*Useful : Save tool as rather than Ctrl + S to save the Zbrush project
Lesson with Josh
Introduction to Z brush
1. Start a new file
2. To enable or disable the lightbox : coma ( , )
3. How to customize the interface in Zbrush
4. Basic drawing in Zbrush
-
Start of with sphere
-
Ctrl + N = clearing the canvas
-
Press "T" to go to edit mode and now you can start to sculpt.
-
Experiment with different brush
-
Alt + brush = pushing the polygon inwards
-
Shift + brush = smooth
-
Alt + Click and drag = moving around
-
Ctrl + D = create new division
-
Shift + D = reduce the division
-
Masking
1. Ctrl + Click drag across the object = mask
2. Ctrl + Click drag the Viewport = delete mask
3. Ctrl + Click on viewport = invert mask
4. Ctrl + Alt + Click drag across object = delete mask on object
5. Ctrl + Brush stroke on object = mask the object
During the beginner lesson, I find it hard to control the brush and moving across the panel.
I watch tutorial on basic sculpting in Zbrush and still unable to understand some of the basic function
Josh's advice : Keep on practising!
Zbrush Intermediate
In the lesson, we learn to create a character from scratch using Zsphere.
1. Draw a Z sphere and go into draw mode.
2. In the draw mode, start adding sphere to represent the part of the body
X = to activate symmetry
Q = to draw
W = move
E = scale
Alt + Click = Delete
A = polymesh
3. Dynamesh to get more details on polygon
4. Mask and extract to create new subtool
5. Start sculpting and have fun!
Zbrush Advanced
Polypaint and texturing
Painting the character.
Fill the object with base colour and start painting!
Important * turn off Zadd/Zsub to disable sculpting while painting unless you want to do both at the same time
Activate RGB and start painting.
Painting texture using spotlight
Texture > Import > Click and add to spotlight
Play with the function in the loop and start texturing!
You can sculpt using the texture as well
Topology - Z Remesher
Creating the topology for the character so it is functional when it comes to rigging.
Clean up the loop and add loop.
Use Z remesher
After attending the lesson on Zbrush, I learn a lot basic in sculpting. Although there are a lot of information, at the same time, I would say I need more practice as this is the first time using Zbrush.
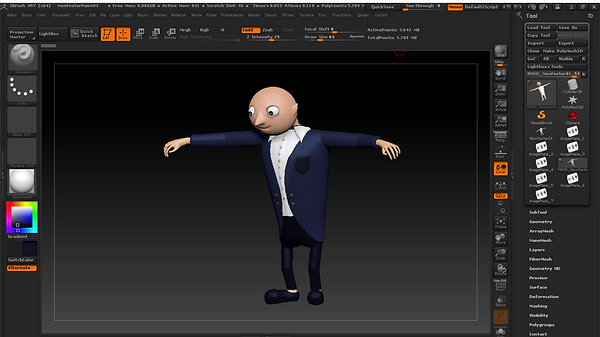
Below are the progress on how I start to sculpt my character. The character is not perfect but I had try my best to applied what I have learn in this term.

Sculpting my character!
Above was the first attempt of me trying to sculpt. I always forget to screenshot my progress, but hopefully the ideas were delivered.
I started off with Z Sphere and try to get the shape of my character by layering my Zsphere on top of my design. I had the opacity turn lower so I could see the different.
I realised I did wrong in this practice as I did not pose the character in T pose and I make polymesh straight away and start sculpting.
The problem I had met is, the symmetry axis is always not symmetrical to me. I find it annoyig when I try to sculpt and I always end up not having the perfect symmetry axis. It is always 1 or 2 polygons difference. I am not sure hoe to fix the problem where I should look into it.
After realising I was wrong I started all over again.
Due to my lack practice, I cant get my character as I wanted in the shape of the silhoutte


After, creating the zsphere of the body, I created the finger and posing it into T pose.
From the T pose, I make it into polymesh.
Note that I did not sculpt the muscle and fat as my character form is smooth and cartoony.
I should make the character with his spine to show he is hunchback. I wish I had more time on sculpting and apply it into my character performance.


From the T pose, I add the clothes details. I mask the area and extract the clothes in the place I want.
I first make the vest and the collar.
Next, I extract the suit and the pants.From the suit, I extract the pocket.
The steps of my sculpting is really basic and I had to practice more if I want to be great in soft modelling.
Clay Buildup, Standard, and Mask pen is the few brush that I keep using. I find move tool is hard to control and I always can't get the shape I want and ended up smoothing it back.


Sculting the face, I start with the nose, trying to get a sharp nose.
Next, eyes > simple mouth > sharp ears.
I am ashamed that I did not put much effort in sculpting but honestly I learn a lot from the mistakes I make.
Adding in spheres as my eyeballs.
Sculp the eye brows but not painting it because he have no eye brows.


After finish sculpting, I paint them using polypaint.
Below are the screenshot of my progression.
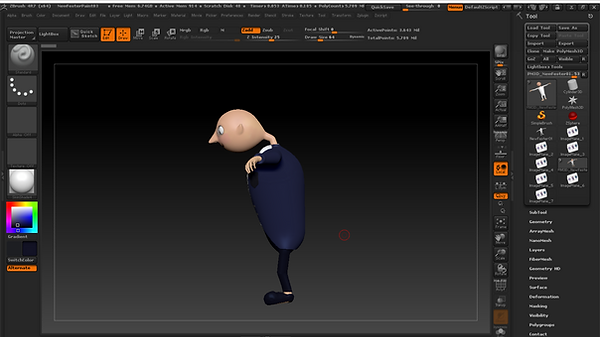
The front, side and right view of my character.
Notice that the silhoutte is not strong as the suit did not had the shape of penguin suit.
(mistake I that I had to look into)
From the side view, the neck look pointed and not curvy. I should not just get the look right from the front and ignore the side view.
The neck is purposely make that way because I want him to look hunchback from the front view.
The shape of the head is off from the side view. I looks like he stick his head out too much.
Posing the character, I was afraid to pose the character as it might break the character.
If I have time before submission, I will come back to my character and pose it!